Shaggy's Guide In Creating a High Quality DVD-Video
For a long time, I was thinking of telling you the process and progress of my BVC's DVD project...Now, since it has been finalized, I'm no longer do the editing..at least, at this time until if i have my next projext...so, I would like to share with you the step I've taken in realizing this project, in a series of pictures..I've divided to 3 sections: A) Capturing & Editing B) Authoring & Burning C) Packaging. I'll sort the order of reading from top to bottom so you can easily view in the right order. Click on each photos to enlarge it.
A) CAPTURING & EDITING
A) CAPTURING & EDITING
1) My Lovely Sony DCR-PC105E Handycam...i've connected the Firewire port from the videocam to the Firewire port,located at my Audigy soundcard..Windows will automatically detect the existence of the videocamera.

2) The capturing process...I've use Adobe Premiere Pro as my NLE suite...you can actually control the videocam
from here...press the record button, and it will start capture to HDD.

3) The footage that has been captured has been imported to the Project widow. Then the 'fun' (& tiresome) step begins - editing...usually, I'll took between 2-3 FULL weeks to complete a movie(what I mean by 'FULL' is, the actual time taken specificly for videoediting, excluding other times like sleeping, eating, playing etc.)...I could make it quicker, just encoded it without doing any editing...but the make the movie more enjoyable, you need to be creative and imaginative at certain parts (like, what effects to be use, what transition, how clips are arranged, what songs is nice to be
included etc...)..look closely at the sequence...imagine how complex is this...

4) Now, the most boring part of all...encoding...depending on the movie complexity, the codec used and how the bitrate/qualityis set, and also other settings used, an hour of video may tookabout 1/2 to a whooping 4-5 hours! On this example (The BVC Farewell Night movie), I used a 2-pass Variable Bit Rate with an average of 2Mbps. This was not the best quality setting, but I had to use it too preserve some DVD spaces for other videos. Notice the time remained...4++ hours!!! and that is only for 1-pass!! I took approx. 12 hours only for this movie to finish encoding...(My highest record was 35 hours non stop for MINT-UTMKL movie!!! crazy, ehh?). And that's for only ONE video...I have at least 8 in possession...
B) AUTHORING & BURNING

5) After all the videos have been encoded, its time to author it in the DVD. For a simple authoring, anyone can use Nero
(or any DVD authoring software for that matter). But to make menus, chapters, button, etc., you need to have a specialize software, like Adobe Encore DVD. This is where I took 8 months to do all of these stuffs. Aligning, linking, create chapter points etc. Again, using my imagination, I design the layout of the DVDs...

6) Now, the 'building' process...Instead of directly build and burn to DVD, I've chose to create an image file of it. So I can reuse this image file without repeating this whole process from the start. The process will take about 20-30 minutes, depending on how big is your stuffs in a DVD, and how fast your PC are.
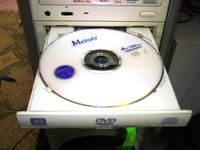

7) I have 2 workable image files which I can open directly using a virtual drive softwares (such as Alcohol 120% of Daemon Tools)...but of course, these image files is stored on the PC, so I have to distribute it to DVD for you guys. I use Alcohol's Image Burning Wizard to burn every each one of them...one DVD+R 4x will take about 15 minutes, so for one copy (which include 2 DVDs), it'll take 30 minutes. The only way to speed up this process it to buy an 8x or maybe 16x DVD+R, which of course, more expensive.
C) PACKAGING


8) I decided to burn the DVD first before sticking the label so that IF there was a burning error, I would not waste any CD labels if I stick it first. As you can see here, this is the kit I use for making the DVD covers. A glossy photo paper, CD labeling sticker, Fellowes/Neato CD Applicator, CD-tray for my Canon i865 printer, and of course, the DVDs which have been burned from the previous step. Shown here is also my Canon i865 printer. I think that this is the best printer I've ever used in my life.

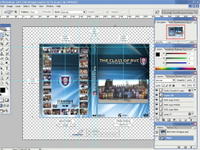
9) To design the DVD labels, as well for DVD's box cover, I use Adobe Photoshop. I use the same template as in Encore DVD, and make a twist a little bit. I took about only a day to design this, since there is a sudden rush of ideas pouring to my brain. It still a complicated process, though. Note: You should find the DVD template first before designing you DVD box cover. This is to ensure you have to correct size of the cover.
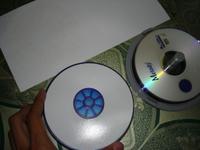
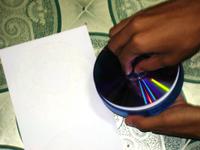
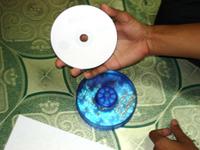
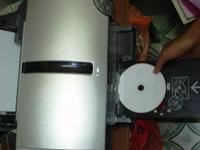
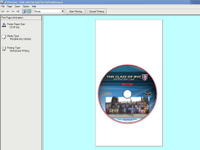
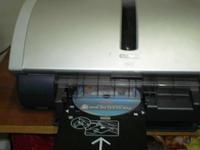
10) Preparing to print on the DVD. first, I use the Applicator to stick the CD label on the DVD. Next, place it on the CD tray and then inserted in the slot in front of my printer.Then, using the appropriate printer settings, the printing process begins.
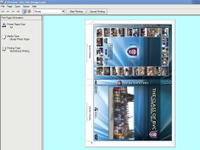

11) Next, print the DVD box cover (what else?) on the glossy photo paper.


12) The last step would be packaging. The 2 DVDs that I've stick with the label is put in a small, standard CD plastic cover. Then I've cut the DVD box cover, folded it and put it in the standard DVD plastic cover. "Hey, you said that it is a box-cover, not a plastic cover!". To cut further cost, I has to use this. A box cover is 5-6x times more expensive than a plastic cover.


13) There you go, a complete package. One of my early customer, Omaq, is so impatiently to have a copy...hehehe...


